Sometimes, when you attempt to access some files on your computer, you may see an Access is Denied warning if the necessary admin permission is not provided. This permission is basically required to access and modify the system files that are otherwise restricted for users with basic privileges. However, if you seek to run the file explorer with the admin rights, we will explain the process in detail.
Using File Explorer Exe File
The file explorer has its main executable file inside the system partition of your Windows device. You can make use of this file to run as an admin. To do it, follow these steps:
Using Task Manager
Task manager is a handy tool to manage the application running over the system. It is used to create new task and run it with admin privileges. To run the file explorer as admin using the Task manager, follow these steps: Alternatively, you can also do this using the Run dialog box,
Using CMD
You can even use the command prompt to give administrative privileges to the file explorer. Here’re the steps:
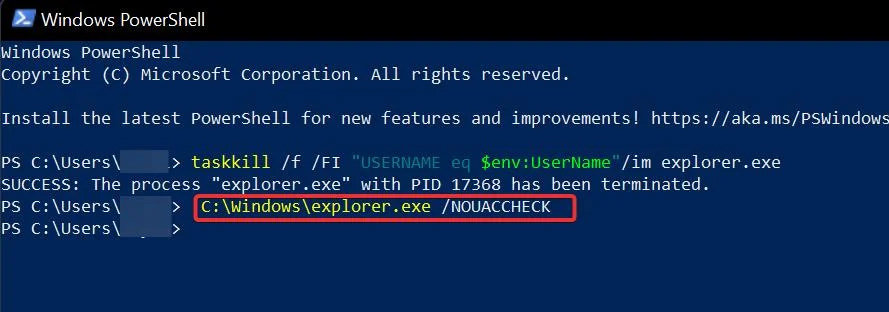
Using Powershell
You can even use PowerShell to run the file explorer as an admin. To do this follow these steps:
Why Do You Need to Run as Admin?
Usually, the Windows OS grants users a basic privilege to work with the files and folders inside the system. However, if you want to go deep inside the system files and modify, delete, replace, or any other thing you need administrative rights. The administrator has basically three permissions on Windows; reading, writing, and executing. Thus, running as an Admin grants you these permissions. You will want to run as an admin for these specific purposes:
Install or Run software packages Making changes to Windows Registry Registering and Savings DLLs. Using some Command Line functions in CMD.
title: “How To Run File Explorer As Admin " ShowToc: true date: “2022-12-08” author: “Robert Slagle”
Sometimes, when you attempt to access some files on your computer, you may see an Access is Denied warning if the necessary admin permission is not provided. This permission is basically required to access and modify the system files that are otherwise restricted for users with basic privileges. However, if you seek to run the file explorer with the admin rights, we will explain the process in detail.
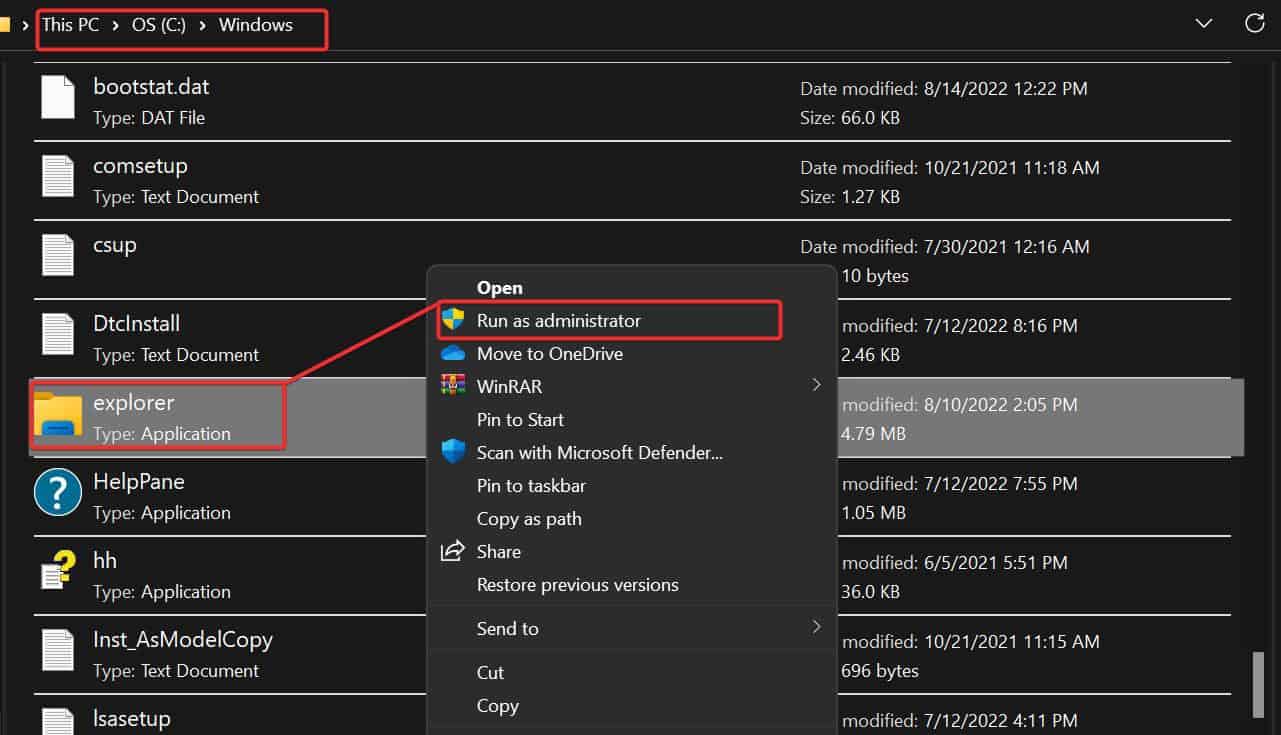
Using File Explorer Exe File
The file explorer has its main executable file inside the system partition of your Windows device. You can make use of this file to run as an admin. To do it, follow these steps:
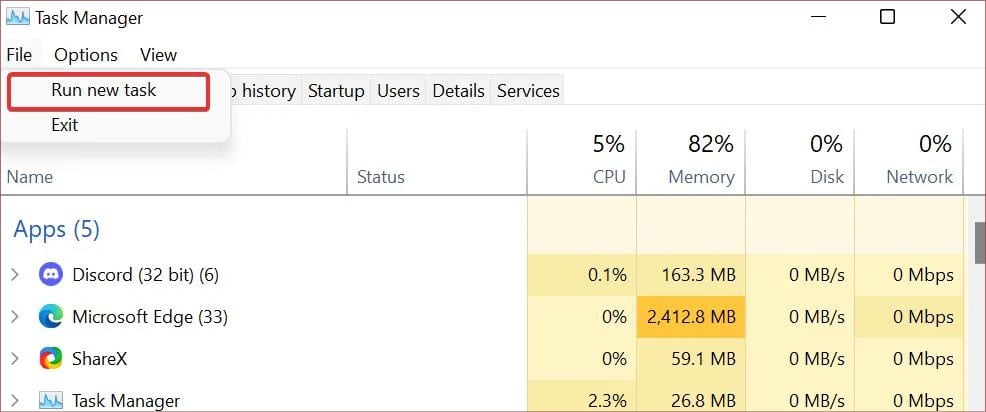
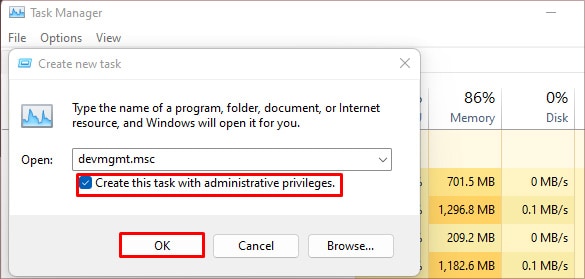
Using Task Manager
Task manager is a handy tool to manage the application running over the system. It is used to create new task and run it with admin privileges. To run the file explorer as admin using the Task manager, follow these steps: Alternatively, you can also do this using the Run dialog box,
Using CMD
You can even use the command prompt to give administrative privileges to the file explorer. Here’re the steps:
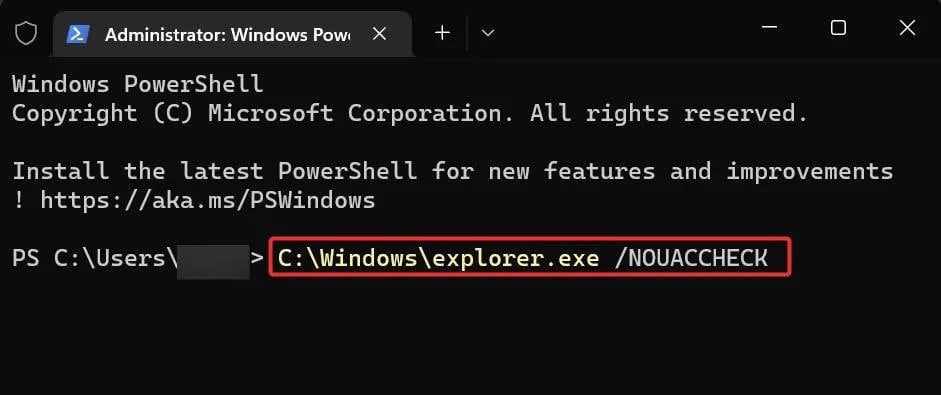
Using Powershell
You can even use PowerShell to run the file explorer as an admin. To do this follow these steps:
Why Do You Need to Run as Admin?
Usually, the Windows OS grants users a basic privilege to work with the files and folders inside the system. However, if you want to go deep inside the system files and modify, delete, replace, or any other thing you need administrative rights. The administrator has basically three permissions on Windows; reading, writing, and executing. Thus, running as an Admin grants you these permissions. You will want to run as an admin for these specific purposes:
Install or Run software packages Making changes to Windows Registry Registering and Savings DLLs. Using some Command Line functions in CMD.
